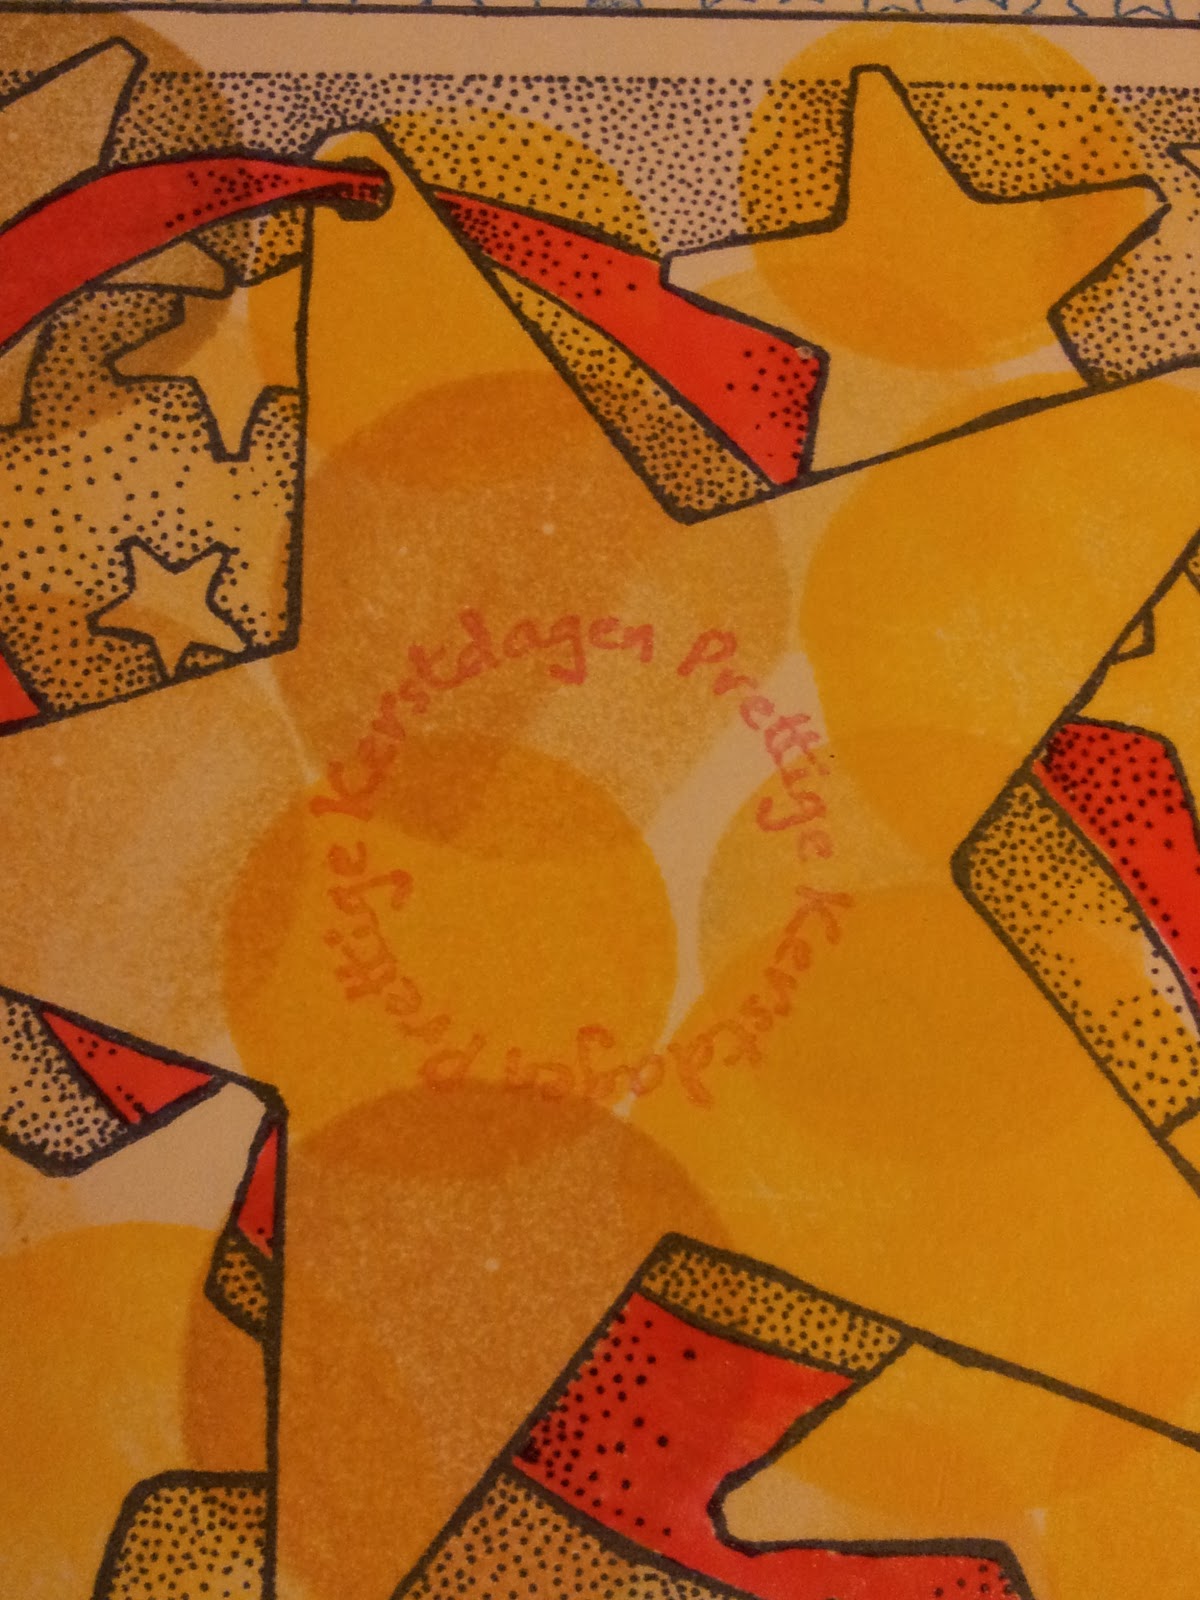
Dag 365 is natuurlijk de verjaardag van dit 365 dagen project. Volgens de kenners moet ik nog 1 dag, want 2012 is een schrikkeljaar, en omdat ik toch nog geen nieuw project heb bedacht, ga ik nog maar gewoon even door. Suggesties voor een nieuw project zijn welkom.
De techniek is weer Puzzled embossing. Ik ben gek van deze techniek.Leek me toepasselijk voor vandaag.
Day 365 of this 365 days project.
Although some say there should be a day 366 because 2012 is a leap year. And because I do not know what the next project should be, I keep on going. I would love to hear ideas for a new project.
Todays techniek is Puzzled embossing. I love that technique, and thought it would be great for today.
Posts tonen met het label Technique Junkie. Alle posts tonen
maandag 20 augustus 2012
vrijdag 17 augustus 2012
Dag 362 Zomerkaartje
Vandaag dan toch het kaartje dat ik gisteren al gepland had. De techniek is eigenlijk hetzelfde als dit kaartje. Maar door gebruik van andere kleuren en net even andere materialen en vormen, krijg je toch een heel ander kaartje.
Today the card I planned to make yesterday.
The technique is the same as I used here. Because I used other colours and different materials and shapes, it became a totally different card.
Today the card I planned to make yesterday.
The technique is the same as I used here. Because I used other colours and different materials and shapes, it became a totally different card.
zondag 5 augustus 2012
Dag 350 Kerstkaart
De hele dag ben ik bezig geweest met mijn monster project. In gebruik bleek het toch nog niet helemaal goed te werken, bovendien er zijn inmiddels weer wat stempelsets bij gekomen.
Daardoor had ik vanavond niet echt een idee wat ik moest maken.
Dus heb ik zoonlief van 15 gevraagd een stempelset uit te kiezen, en stempel inkt. Daarmee moest ik een kaart maken. Voor de achtergrond (een technique Junkie techniek) heb ik nog distress inkt gebruikt. Maar verder heb ik me beperkt tot zijn keuzes. Want niet alleen koos hij de stempelset, het moest ook met de pinguin.
Busy all day with my monster project. In reality it did not turn out as it should. Plus a couple of new stamp sets arrived.
That's why I didn't have a single idea what to make. So I asked my 15-year old son to pick a stamp set and the ink and created a card with that. For the background I used distress ink for applying a Technique Junkie technique, but that was the only digression from his choices: He did not only choose the stamp set but also insisted on the penguin.
Daardoor had ik vanavond niet echt een idee wat ik moest maken.
Dus heb ik zoonlief van 15 gevraagd een stempelset uit te kiezen, en stempel inkt. Daarmee moest ik een kaart maken. Voor de achtergrond (een technique Junkie techniek) heb ik nog distress inkt gebruikt. Maar verder heb ik me beperkt tot zijn keuzes. Want niet alleen koos hij de stempelset, het moest ook met de pinguin.
Busy all day with my monster project. In reality it did not turn out as it should. Plus a couple of new stamp sets arrived.
That's why I didn't have a single idea what to make. So I asked my 15-year old son to pick a stamp set and the ink and created a card with that. For the background I used distress ink for applying a Technique Junkie technique, but that was the only digression from his choices: He did not only choose the stamp set but also insisted on the penguin.
woensdag 1 augustus 2012
Dag 346 Roos
Midden in de zomer vakantie beginnen met een nieuwe baan is niet echt gemakkelijk. Vooral voor het thuisfront niet, en niet voor de nieuw op te bouwen routine.
Een kaartje maken is daarom bijna een opgave. Hoewel wel een heeel goede ontspanning na zo een eerste werkdag.
Ik heb dus gekozen voor een snel kaartje in een simpele techniek. De techniek is van Technique Junkie en heet color blocking (geloof ik)
De stempels zijn van Stampin Up, Wild Rose, Jaren geleden al 'retired'
Starting a new job in de middle of the summer holiday is not easy. Especially for the family, and really a problem to find a new routine.
Making a card at the end of the day is really a task. But real good to relax after the first day at work.
I choose to make a quick card in a simple technique.
The technique is Technique Junkie, and is called color blocking (If I am not mistaken)
The stamps are Stampin Up,Wild Rose. retired since long,
Een kaartje maken is daarom bijna een opgave. Hoewel wel een heeel goede ontspanning na zo een eerste werkdag.
Ik heb dus gekozen voor een snel kaartje in een simpele techniek. De techniek is van Technique Junkie en heet color blocking (geloof ik)
De stempels zijn van Stampin Up, Wild Rose, Jaren geleden al 'retired'
Starting a new job in de middle of the summer holiday is not easy. Especially for the family, and really a problem to find a new routine.
Making a card at the end of the day is really a task. But real good to relax after the first day at work.
I choose to make a quick card in a simple technique.
The technique is Technique Junkie, and is called color blocking (If I am not mistaken)
The stamps are Stampin Up,Wild Rose. retired since long,
maandag 23 juli 2012
Dag 337 Kerst cirkels
Met de cirkel techniek heb ik een kerstkaartje gemaakt.
De achtergrond papier heb ik bestempeld met een builder wheel.
Ik ben te moe voor een uitgebreid blog, ik denk dat ik maar gewoon ga slapen.
With the circle technique I made a christmascard.
The background paper I stamped with a builder wheel stamp.
I am to tired to blog anything else, I think I better go to sleep now...
De achtergrond papier heb ik bestempeld met een builder wheel.
Ik ben te moe voor een uitgebreid blog, ik denk dat ik maar gewoon ga slapen.
With the circle technique I made a christmascard.
The background paper I stamped with a builder wheel stamp.
I am to tired to blog anything else, I think I better go to sleep now...
maandag 16 juli 2012
Dag 331 Shattered glass
Omdat ik heel druk ben met een speciaal (en vooralsnog geheim) project, heb ik niet zo heel veel knutseltijd, -energie en -inspiratie over.
Om toch iets te maken voor het blog, heb ik vanavond de Technique Junkies nieuwsbrieven erbij gepakt. Werkelijk het beste cadeau ooit! Bron van inspiratie, en na even zoeken zelfs een snelklaar techniek.
Als basis heb ik een kaartje parelmoer papier gepakt. Ook na inkten geeft dat een mooie glas aan het kaartje. Helaas lukt het me niet om dat goed op de foto te vangen.
De stempels zijn uit een nieuw gescoorde Stampin Up set. Het is een oudje, maar niet minder gaaf.
Voor de verandering eens een snel klaar kaartje, met een groots effect.
Because I am busy with project (secret for the time being) I do not have left much crafting time, energie and inspiration.
To have something to post on my blog today, I turned to the Technique Junkie Newsletter CD's (best present ever). They are a ton of inspiration, and after a little search I found a Must try technique that was fast.
The base is a pearlicent card. Even inkt is has a great shine over it, sadly I am not able to catch that on a picture.
The stamps are from an old Stampin Up set, I just recently scored.
For a change a real quick card, with a great effect.
Om toch iets te maken voor het blog, heb ik vanavond de Technique Junkies nieuwsbrieven erbij gepakt. Werkelijk het beste cadeau ooit! Bron van inspiratie, en na even zoeken zelfs een snelklaar techniek.
Als basis heb ik een kaartje parelmoer papier gepakt. Ook na inkten geeft dat een mooie glas aan het kaartje. Helaas lukt het me niet om dat goed op de foto te vangen.
De stempels zijn uit een nieuw gescoorde Stampin Up set. Het is een oudje, maar niet minder gaaf.
Voor de verandering eens een snel klaar kaartje, met een groots effect.
Because I am busy with project (secret for the time being) I do not have left much crafting time, energie and inspiration.
To have something to post on my blog today, I turned to the Technique Junkie Newsletter CD's (best present ever). They are a ton of inspiration, and after a little search I found a Must try technique that was fast.
The base is a pearlicent card. Even inkt is has a great shine over it, sadly I am not able to catch that on a picture.
The stamps are from an old Stampin Up set, I just recently scored.
For a change a real quick card, with a great effect.
vrijdag 13 juli 2012
Dag 328 Copic Outlines
In de laatste Technique Junkies newsletter staat een tutorial die ik graag nog wilde uitproberen. Alleen, ik heb geen copics. Dus heb ik het geprobeerd met aquamarkers, en dat werkt dus ook.
Eigenlijk had ik iets anders gepland voor vandaag, het huishouden kostte echter meer tijd dan ik verwacht had. Morgen dan maar, of zondag. Nu eerst, welterusten allemaal.
In the latest Technique Junkies newsletter is a technique I really wanted to try. The only thing is, I do not own copic markers. I thought to try it with Aquamarkers, I do have 3 of those, and that worked aswell.
I had planned something totally different for today, my housekeeping took more time than I anticipated, so that will have to wait till tomorrow, or sunday.
For now, good night to you all.
Eigenlijk had ik iets anders gepland voor vandaag, het huishouden kostte echter meer tijd dan ik verwacht had. Morgen dan maar, of zondag. Nu eerst, welterusten allemaal.
In the latest Technique Junkies newsletter is a technique I really wanted to try. The only thing is, I do not own copic markers. I thought to try it with Aquamarkers, I do have 3 of those, and that worked aswell.
I had planned something totally different for today, my housekeeping took more time than I anticipated, so that will have to wait till tomorrow, or sunday.
For now, good night to you all.
maandag 9 juli 2012
Dag 323 Cirkels
Voor de Just One uitdaging bij Technique Junkies heb ik een rondjes kaart gemaakt. Deze is eigenlijk per ongeluk ontstaan. Mijn 1"circle punch werkte niet goed, om hem te scherpen heb ik geponsd met aluminium. Dat had niet het gewenste effect, maar leverde wel een hele serie leuke rondjes op, uit een blikje gestansd.
Die rondjes heb ik geembossed met 2 verschillende embossing folders, en op een kaart geplakt.
Daarna heb ik de kaart afgemaakt met een grote cirkel, geponsd van een stempelafdruk van mijn nieuwe favoriete stempel. 'Every Breath' van Unity Stamps.
For the Just One challenge at Technique Junkies, I have made a circle card. It was kind of an accident that it became a circle card.
My 1"punch didn't work properly, so I punched out aluminium, and later also a tin. It didn't manage to repair my punch, but it did leave me with a bunch of fun circles.
I run them trought the Cuttlebug with 2 different embossingfolders. And glued them onto a card.
Then I stamped my new favorite stamp 'Every Breath' by Unity Stamps. Coloured it, and punched out a big circle.
Die rondjes heb ik geembossed met 2 verschillende embossing folders, en op een kaart geplakt.
Daarna heb ik de kaart afgemaakt met een grote cirkel, geponsd van een stempelafdruk van mijn nieuwe favoriete stempel. 'Every Breath' van Unity Stamps.
For the Just One challenge at Technique Junkies, I have made a circle card. It was kind of an accident that it became a circle card.
My 1"punch didn't work properly, so I punched out aluminium, and later also a tin. It didn't manage to repair my punch, but it did leave me with a bunch of fun circles.
I run them trought the Cuttlebug with 2 different embossingfolders. And glued them onto a card.
Then I stamped my new favorite stamp 'Every Breath' by Unity Stamps. Coloured it, and punched out a big circle.
zondag 8 juli 2012
Dag 322 Faux frosted window Christmas card
Ik heb me voorgenomen om met elke nieuw geleerde techniek een kerstkaart te maken (of 2) dus ook geprobeerd met de Frosted Window techniek.
De achtergrond is een Credit card techniek. Een paar druppels (acryl) verf op een kaart, en uitsmeren met een kaartje.
Dit soort technieken maak ik altijd in serie, zodat ik wat op voorraad heb voor kaartjes, en daar zit altijd een achtergrond in kerstkleuren tussen.
De strik is een Faux Bow. Ooit eens ergens op internet opgepikt, ik gebruik hem graag als ik een grote strik nodig heb.
I have the intention to make a christmas card (or 2) with every new technique I learn.
So I did that with the Frosted Window technique.
The background is called Credit Card technique. Which is strange, because there is not really a credit card involved.
Put a few drops of (acrylic)paint on the top of a card, and move it over the card using a plastic card.
This kind of techniques I always try out so I have a lot of background left. And there is always a christmas coloured one between them.
The bow is a faux bow, a technique I found on the internet one day, and I love to use it when I need a big bow.
De achtergrond is een Credit card techniek. Een paar druppels (acryl) verf op een kaart, en uitsmeren met een kaartje.
Dit soort technieken maak ik altijd in serie, zodat ik wat op voorraad heb voor kaartjes, en daar zit altijd een achtergrond in kerstkleuren tussen.
De strik is een Faux Bow. Ooit eens ergens op internet opgepikt, ik gebruik hem graag als ik een grote strik nodig heb.
I have the intention to make a christmas card (or 2) with every new technique I learn.
So I did that with the Frosted Window technique.
The background is called Credit Card technique. Which is strange, because there is not really a credit card involved.
Put a few drops of (acrylic)paint on the top of a card, and move it over the card using a plastic card.
This kind of techniques I always try out so I have a lot of background left. And there is always a christmas coloured one between them.
The bow is a faux bow, a technique I found on the internet one day, and I love to use it when I need a big bow.
zaterdag 7 juli 2012
DaG 320 Faux frosted glass
Van mijn lief kreeg ik alle technique Junkie newsletter CD's Ik ben gewoon boven aan begonnen om al die technieken uit te proberen. De eerst technique die ik wilde proberen heet: Frosted Glass. Met een ouderwetse embossingmal, en een stukje acetate maak je ene kaart. Maar hoe ik het ook probeerde, ik kreeg geen beweging in het acetate met de cuttlebug, en de mal die ik had uitgekozen, is heel zwaar om te embossen. Heel mooi, maar heel zwaar. Na heel wat pogingen, gaf ik het op.
Bij het opruimen echter, dacht ik, waarom probeer ik het niet zonder acetate. En dat werkte prima. De inkt heb ik gewoon op de folder aangebracht met een brayer, en daarna afgedrukt op aquarel papier.
En daarmee was de kaart snel klaar.
For my birthday, my husband gave me, all the Technique Newsletters. I decided to try them all, and start at the top.
The first technique is called Frosted Glass. With a Brass embossing plate and a piece of acetate you make a card.
But how I tried, I couldn't get any impression into the acetate, using the Cuttlebug. The plate I choose is very hard to embos by hand.
After countless tries, I gave up, and was putting away my stuff, I thought Why don't I try this technique without the Acetate. With a brayer I put ink on the brass plate, and printed it into a piece of watercolor paper.
After that, the card was real easy to make.
Bij het opruimen echter, dacht ik, waarom probeer ik het niet zonder acetate. En dat werkte prima. De inkt heb ik gewoon op de folder aangebracht met een brayer, en daarna afgedrukt op aquarel papier.
En daarmee was de kaart snel klaar.
For my birthday, my husband gave me, all the Technique Newsletters. I decided to try them all, and start at the top.
The first technique is called Frosted Glass. With a Brass embossing plate and a piece of acetate you make a card.
But how I tried, I couldn't get any impression into the acetate, using the Cuttlebug. The plate I choose is very hard to embos by hand.
After countless tries, I gave up, and was putting away my stuff, I thought Why don't I try this technique without the Acetate. With a brayer I put ink on the brass plate, and printed it into a piece of watercolor paper.
After that, the card was real easy to make.
maandag 2 juli 2012
Dag 317 Style
Van mijn lief kreeg ik voor mijn verjaardag (maar 10 dagen na mijn verjaardag) de complete set Technique Junkie Newsletter CD's. Een van de technieken die ik daarop tegen kwam heb ik vanavond gebruikt voor het maken van het kaartje. Colorblocks.
Eigenlijk had ik de gestempelde delen willen kleuren. Maar toen ik ze op de kaart legde om de layout van de kaart te bepalen, vond ik het wel stijlvol zo. Dus heb ik het zo gelaten.
For my birthday, my love gave me the Technique Junkie Newsletter CD's.
One of the techniques I found on them, I used tonight to make this card. Colorblocks.
I was planning to colour the stamped parts. But when I put all the parts on the card, to decide on the layout, I thought is was kind of stylish without more colour, so I left it like this.
Eigenlijk had ik de gestempelde delen willen kleuren. Maar toen ik ze op de kaart legde om de layout van de kaart te bepalen, vond ik het wel stijlvol zo. Dus heb ik het zo gelaten.
For my birthday, my love gave me the Technique Junkie Newsletter CD's.
One of the techniques I found on them, I used tonight to make this card. Colorblocks.
I was planning to colour the stamped parts. But when I put all the parts on the card, to decide on the layout, I thought is was kind of stylish without more colour, so I left it like this.
maandag 25 juni 2012
Dag 310 Kerstkaart
Eindelijk de kerstkaart die lag te drogen van de week. Hij was al wel droog, maar er kwam steeds een ander iets tussen.
De achtergrond is gemaakt met de Te gekke krijtjes. Over een embossing folder. Eerst had ik de stempel gezet, en gemaskerd en daarna de achtergrond gemaakt.
De stempel is vervolgens ingekleurd met glitter, volgens een Technique Junkies techniek.
De stempels, zijn Inkerbelstamps.
Finally the christmas card that had to dry earlier. It was dry already, but there were other things to show.
I made the background with the 'te gekke krijtjes' I used an embossingfolder for it. First I stamped the christmas tree, and masked it. Then I made the background.
I coloured the stamp with glitter, in a Technique Junkies Technique.
The stamps are Inkerbellstamps
De achtergrond is gemaakt met de Te gekke krijtjes. Over een embossing folder. Eerst had ik de stempel gezet, en gemaskerd en daarna de achtergrond gemaakt.
De stempel is vervolgens ingekleurd met glitter, volgens een Technique Junkies techniek.
De stempels, zijn Inkerbelstamps.
Finally the christmas card that had to dry earlier. It was dry already, but there were other things to show.
I made the background with the 'te gekke krijtjes' I used an embossingfolder for it. First I stamped the christmas tree, and masked it. Then I made the background.
I coloured the stamp with glitter, in a Technique Junkies Technique.
The stamps are Inkerbellstamps
dinsdag 12 juni 2012
Dag 299 Cirkels
Technique Junkies techniek 2 heet Circle Colored Collage. En ik vind hem super!
Ik heb voor de achtergrond een Hero Arts stempel gebruikt, die ingekleurd met cirkelstempels, en daarna geembossed met de bijpassende embossingfolder. Tenslotte heb ik bloemhartjes gemaakt met een perlenpen.
Het label was wat lastiger. Ik wist ongeveer wat ik wilde maken maar het kostte een hoop papier, en nog meer trial en error voor ik uiteindelijk dit label had gemaakt. Voor de verandering een strikje gemaakt. Soms vind ik dat leuk.
Technique Junkie Technique 2 is called Circle Colored Collage. And I love it!
For the background I used a Hero Arts stamp. I coloured it with the circle stamps, and embossed with the matching embossingfolder. Then I made the flower centres with a Perlenpen.
The label was a struggle. I knew, kind of, what I wanted to make. It took a lot of paper, and even more trial and error, before I had a label I liked.
I even made a bow this time. Sometimes I like that.
Ik heb voor de achtergrond een Hero Arts stempel gebruikt, die ingekleurd met cirkelstempels, en daarna geembossed met de bijpassende embossingfolder. Tenslotte heb ik bloemhartjes gemaakt met een perlenpen.
Het label was wat lastiger. Ik wist ongeveer wat ik wilde maken maar het kostte een hoop papier, en nog meer trial en error voor ik uiteindelijk dit label had gemaakt. Voor de verandering een strikje gemaakt. Soms vind ik dat leuk.
Technique Junkie Technique 2 is called Circle Colored Collage. And I love it!
For the background I used a Hero Arts stamp. I coloured it with the circle stamps, and embossed with the matching embossingfolder. Then I made the flower centres with a Perlenpen.
The label was a struggle. I knew, kind of, what I wanted to make. It took a lot of paper, and even more trial and error, before I had a label I liked.
I even made a bow this time. Sometimes I like that.
vrijdag 2 maart 2012
Dag 199 Free Standing Pop-Up
Bewegende kaarten vind ik geweldig. Leuk om te maken, leuk om te geven, leuk om te krijgen. Sinds kort ben ik er heel erg mee bezig, omdat ik niet alleen de nieuwsbrieven van Technique Junkies heb ontdekt, maar op de tutorial CD's die ze uitgeven. Daar op staan niet alleen stempel technieken maar ook kaartvouw en snij technieken. Zeker op de 3D en fun folds CD.
Daar komt ook deze kaart vandaan.
Alleen werken ze op de CD met design papier, en dat heb ik zelf gestempeld. Ik heb een nieuwe stempel van Tim Holtz gekocht. De Woodgrain wilde ik heel graag hebben en daar zat een stempel bij die 'Wall Paper' heet. Ik heb lang getwijfeld of ik die wilde hebben maar eenmaal in huis, wilde ik hem wel proberen.
Uiteindelijk heb ik gestempeld met de Crayon Shadows techniek van de Stampin Companion CD. De stempel inkleuren mbv aquarelkrijt en een penseel, en dan afdrukken. Het is even uitproberen hoe nat, en welk papier het mooiste werkt. Maar het effect is dan bijzonder, en vooral onverwacht.
Met lichte kleuren heb ik een stuk designpapier gemaakt voor de kaart, en die in de juiste maten snijden, en gevouwen.
Voor de kaart heb ik een kaart gesneden en daar met dezelfde techniek een bloem met bladeren op gestempeld. Voor de mat van de kaart heb ik een dezelfde wallpaper stempel gebruikt maar nu gestempeld met een donkerrode kleur.
De mat op de juiste maat gesneden en achter de kaart geplakt
Op de basis heb ik een sentiment gestempeld in dezelfde diep rode kleur.
Daarna heb ik de kaart volgens de tutorial in elkaar geplakt. Boven op de kaart heb ik een scallop cirkel en een gewone cirkel geponst, uit de restjes van het papier dat ik met wallpaper had bestempeld. Ik heb er een gaatje in geponst en een stukje lint in geknoopt.
Voor de finishing tough heb ik nog een vlinder gestempeld met de Crayon Shadows techniek, uitgeknipt en met foamtape blocks opgeplakt. Door in het midden een dunnere te gebruiken dan onder de vleugels, lijkt de vlinder zijn vleugels een beetje op te tillen.
Moving cards are fun. Fun to make, fun to give, fun to get. I'm occupying myself with them recently not only because of the Technique Junkie newslette but also because of the tutorial CDs they're providing. They have stamping techniques but also cardfoling and cardcutting techniques especially on the 3D and Fun Folds CD. That's where this card is coming from.
The CD works with design paper. I stamped the paper myself. Bought a new Tim Holz stamp, woodgrain, and that came with another called Wallpaper. I doubted quite long if I wanted to own it but since I have it I wanted to try it.
I used the Crayon Shadows technique from the Stampin' Companion CD. I inked the stamp with watercolour crayon and a paintbrush then stamped with it. It takes some experimentation to determine what paper works with the amount of wetness you're using. The effect is always special and can be quite unexpected.
I created a piece of design paper for the card, cut it to measure then folded it. For the card I cut a piece and used the same technique to stamp flowers and leaves. For the matting I used the same Wallpaper stamp but used a dark red color. I subsequently followed the tutorial to assemble the card. I used scraps of the paper I created to punch a scallop circle and a regular circle, punched a hole and added a piece of ribbon. The finishing touch is a butterfly stamped with the Crayons Shadow technique, cut it out and mounted it with foamtape blocks. By using a thinner one in the center it looks as if the butterfly is lifting up its wings.
Daar komt ook deze kaart vandaan.
Alleen werken ze op de CD met design papier, en dat heb ik zelf gestempeld. Ik heb een nieuwe stempel van Tim Holtz gekocht. De Woodgrain wilde ik heel graag hebben en daar zat een stempel bij die 'Wall Paper' heet. Ik heb lang getwijfeld of ik die wilde hebben maar eenmaal in huis, wilde ik hem wel proberen.
Uiteindelijk heb ik gestempeld met de Crayon Shadows techniek van de Stampin Companion CD. De stempel inkleuren mbv aquarelkrijt en een penseel, en dan afdrukken. Het is even uitproberen hoe nat, en welk papier het mooiste werkt. Maar het effect is dan bijzonder, en vooral onverwacht.
Met lichte kleuren heb ik een stuk designpapier gemaakt voor de kaart, en die in de juiste maten snijden, en gevouwen.
Voor de kaart heb ik een kaart gesneden en daar met dezelfde techniek een bloem met bladeren op gestempeld. Voor de mat van de kaart heb ik een dezelfde wallpaper stempel gebruikt maar nu gestempeld met een donkerrode kleur.
De mat op de juiste maat gesneden en achter de kaart geplakt
Op de basis heb ik een sentiment gestempeld in dezelfde diep rode kleur.
Daarna heb ik de kaart volgens de tutorial in elkaar geplakt. Boven op de kaart heb ik een scallop cirkel en een gewone cirkel geponst, uit de restjes van het papier dat ik met wallpaper had bestempeld. Ik heb er een gaatje in geponst en een stukje lint in geknoopt.
Voor de finishing tough heb ik nog een vlinder gestempeld met de Crayon Shadows techniek, uitgeknipt en met foamtape blocks opgeplakt. Door in het midden een dunnere te gebruiken dan onder de vleugels, lijkt de vlinder zijn vleugels een beetje op te tillen.
Moving cards are fun. Fun to make, fun to give, fun to get. I'm occupying myself with them recently not only because of the Technique Junkie newslette but also because of the tutorial CDs they're providing. They have stamping techniques but also cardfoling and cardcutting techniques especially on the 3D and Fun Folds CD. That's where this card is coming from.
The CD works with design paper. I stamped the paper myself. Bought a new Tim Holz stamp, woodgrain, and that came with another called Wallpaper. I doubted quite long if I wanted to own it but since I have it I wanted to try it.
I used the Crayon Shadows technique from the Stampin' Companion CD. I inked the stamp with watercolour crayon and a paintbrush then stamped with it. It takes some experimentation to determine what paper works with the amount of wetness you're using. The effect is always special and can be quite unexpected.
I created a piece of design paper for the card, cut it to measure then folded it. For the card I cut a piece and used the same technique to stamp flowers and leaves. For the matting I used the same Wallpaper stamp but used a dark red color. I subsequently followed the tutorial to assemble the card. I used scraps of the paper I created to punch a scallop circle and a regular circle, punched a hole and added a piece of ribbon. The finishing touch is a butterfly stamped with the Crayons Shadow technique, cut it out and mounted it with foamtape blocks. By using a thinner one in the center it looks as if the butterfly is lifting up its wings.
zondag 26 februari 2012
dag 194 Deur
Soms komen dingen zo mooi bij elkaar.
Op de Stampin Companion CD van Technique Junkies staat een tutorial van een deur. Die wilde ik graag uitproberen. En toen mijn vriendin aankwam met een Tim Holtz woodgrain stempel, kwam dat mooi samen met de houtnerf die in de tutorial werd gebruikt.
Ik heb de Tim Holtz woodgrain gestempeld met een Big and Juicy. Daarna heb ik de deur gemaakt zoals in de tutorial werd beschreven.
Voor de krans heb ik bloemen gestempeld met rood, en die met de bijbehorende pons uitgeponst.
Sometimes things just fit perfectly.
On the Technique Junkie Stampin Companion CD is a tutorial of a door. I already wanted to try that one out, but when my friend came with the Tim Holtz Woodgrain stamp, I just had to combine those two.
I stamped the Tim Holtz Woodgrain with a Big and Juicy, and made the door according the tutorial.
For the garland I stamped the flowers in red, and punched them out with the punch belonging to the stamp.
Op de Stampin Companion CD van Technique Junkies staat een tutorial van een deur. Die wilde ik graag uitproberen. En toen mijn vriendin aankwam met een Tim Holtz woodgrain stempel, kwam dat mooi samen met de houtnerf die in de tutorial werd gebruikt.
Ik heb de Tim Holtz woodgrain gestempeld met een Big and Juicy. Daarna heb ik de deur gemaakt zoals in de tutorial werd beschreven.
Voor de krans heb ik bloemen gestempeld met rood, en die met de bijbehorende pons uitgeponst.
Sometimes things just fit perfectly.
On the Technique Junkie Stampin Companion CD is a tutorial of a door. I already wanted to try that one out, but when my friend came with the Tim Holtz Woodgrain stamp, I just had to combine those two.
I stamped the Tim Holtz Woodgrain with a Big and Juicy, and made the door according the tutorial.
For the garland I stamped the flowers in red, and punched them out with the punch belonging to the stamp.
donderdag 23 februari 2012
Dag 191 Nog meer cirkels
Als ik een leuke techniek heb gevonden, wil ik er altijd een paar kaarten mee maken, om te zien hoe de techniek met verschillende manieren, en kaarten uitvalt.
Dus heb ik van de week 145 cirkels gestempeld, en die uitponst.
Ik heb een stuk cardstock dubbelgevouwen, en de randen beinkt met een lichte roze kleur. Daarna de rondjes opgepakt. Ik heb niet echt een kleuren schema aangehouden, wat voor iemand met mijn behoefte aan symmetrie best een uitdaging is.
Toen dat klaar was heb ik een ATC gemaakt. Bij het maken daarvan heb ik expres niet de kleuren gebruikt die in de rondjes zaten. Zowel om het contrast groter te maken, maar ook vanwege de tekst die op de rondjes staat.
Voor de ATC heb ik eerst een tak gestempeld op een ATC. Daar ook een masker van geknipt, en de tak gemaskerd. Daarna heb ik een script half over de ATC gestempeld, een beetje scheef. En het geheel gesponsed met Distress inkt.
Voor de bloemen heb ik de tak nog 3x in rood op een stuk cardstock gestempeld, en de bloemen met een heel oude, heel kleine bloemenpons uitgeponst. Voor de hartjes van de bloemen, heb ik de hotfix gebruikt.
De bloemen heb ik met 3D lijm aan de ATC vastgemaakt.
When I learn a new technique which I like, I always make several cards with it. So I can discover if I like the technique in different ways.
So I stamped 145 circles this week, and punched them out.
I folded a piece of cardstock in half, and inked the edges in a very light pink. Then I glued the circles on it. I didn't do that in a kind of colour scheme, which is difficult for someone with a need for symmetrie like myself.
When that was finished I made an ATC. I didn't use the colours I used on the circles. Not only because there is more contrast that way, but also because of the text on the circles.
For the ATC I stamped a branch on an ATC. I cut a mask and masked the branch. I stamped a script half over the ATC, a bit out of line. And sponged the complete ATC with distress ink.
For the flowers I stamped the branch 3 more times on a piece of cardstock, and punched the flowers with a very old, very small flower punch.
I used the hotfix to attache some glimmer to the heart of the flowers, and attached them with 3D glue to the ATC.
Dus heb ik van de week 145 cirkels gestempeld, en die uitponst.
Ik heb een stuk cardstock dubbelgevouwen, en de randen beinkt met een lichte roze kleur. Daarna de rondjes opgepakt. Ik heb niet echt een kleuren schema aangehouden, wat voor iemand met mijn behoefte aan symmetrie best een uitdaging is.
Toen dat klaar was heb ik een ATC gemaakt. Bij het maken daarvan heb ik expres niet de kleuren gebruikt die in de rondjes zaten. Zowel om het contrast groter te maken, maar ook vanwege de tekst die op de rondjes staat.
Voor de ATC heb ik eerst een tak gestempeld op een ATC. Daar ook een masker van geknipt, en de tak gemaskerd. Daarna heb ik een script half over de ATC gestempeld, een beetje scheef. En het geheel gesponsed met Distress inkt.
Voor de bloemen heb ik de tak nog 3x in rood op een stuk cardstock gestempeld, en de bloemen met een heel oude, heel kleine bloemenpons uitgeponst. Voor de hartjes van de bloemen, heb ik de hotfix gebruikt.
De bloemen heb ik met 3D lijm aan de ATC vastgemaakt.
When I learn a new technique which I like, I always make several cards with it. So I can discover if I like the technique in different ways.
So I stamped 145 circles this week, and punched them out.
I folded a piece of cardstock in half, and inked the edges in a very light pink. Then I glued the circles on it. I didn't do that in a kind of colour scheme, which is difficult for someone with a need for symmetrie like myself.
When that was finished I made an ATC. I didn't use the colours I used on the circles. Not only because there is more contrast that way, but also because of the text on the circles.
For the ATC I stamped a branch on an ATC. I cut a mask and masked the branch. I stamped a script half over the ATC, a bit out of line. And sponged the complete ATC with distress ink.
For the flowers I stamped the branch 3 more times on a piece of cardstock, and punched the flowers with a very old, very small flower punch.
I used the hotfix to attache some glimmer to the heart of the flowers, and attached them with 3D glue to the ATC.
maandag 20 februari 2012
Dag 188 Rondjes / Circles
Voor de kicostampers maandtechniek (tapelifting) had ik een oud boek in huis. Ik vind boeken stuk maken heel moeilijk, boeken zijn om te lezen, niet om te gebruiken voor kaarten. Deze heb ik gekregen om stuk te maken. En hoewel het me dan nog moeite kost, doe ik het wel.
In het moment tussen slapen en wakker worden, kreeg ik een goed idee. De circle techniek van Technique Junkies kon ik ook met een boek doen.
Daad bij woord voegend, heb ik een paar bladzijden uit het boek gescheurd, en daar rondjes uit geponsd met een 1" cirkel pons.
Omdat het zo een beetje saai was, heb ik elk rondje met oude Hero Arts stempelkussens aan de randjes beinkt.
Daarna willekeurig op een kaartje geplakt. Iets over de rand heen, zodat de rondjes goed uitkomen.
De stempel is een Stampin Up stempel die ik op een cirkel gestempeld heb. Daarna heb ik de auto ingekleurd met Perfect Pearls (vandaar de schittering op de foto) en Blonde Moments acrylverf. Die heeft ook een shimmer.
Omdat ik de cirkel met auto zo op de rondjes wat saai vond, heb ik nog een grotere cirkel gesneden en daar de autocirkel mee gemat.
Ook deze techniek is een blijvertje denk ik. Jammer dat ik de nieuwsbrief waar hij instaat kwijt ben, zodat ik niet de juiste naam kan noemen.
For this months Kicostampers technique - tapelifting - I had an old
book at hand. I find it difficult to destroy books. They're for reading
not to create cards from. Even if i received this one to use it I still
found it difficult but in the end I used it anyway.
In the moment between sleeping and waking up I got an idea. The circle
technique of Technique Junkies could also be done with a book. So I tore
a couple of pages from the book and punched out 1" circles. Because the
result was a bit boring I inked the edges of each circle with some old
Hero Arts inkpads.
After that I randomly glued them to a card, a bit over the edge to make
the circles stand out. The stamp is a Stampin' Up stamp I used on a circle.
Then colored the card with Perfect Pearls (that's why there is glittering
on the photograph) and Blonde Moments acrylic paint. That also contains
a shimmer.
Because I thought that the circle and the car on top of the small circles
was a bit boring I also matted the circle with a slightly larger one.
This technique is also here to stay I think . I lost the newsletter that
described the technique so I cannot call it by its proper name alas.
In het moment tussen slapen en wakker worden, kreeg ik een goed idee. De circle techniek van Technique Junkies kon ik ook met een boek doen.
Daad bij woord voegend, heb ik een paar bladzijden uit het boek gescheurd, en daar rondjes uit geponsd met een 1" cirkel pons.
Omdat het zo een beetje saai was, heb ik elk rondje met oude Hero Arts stempelkussens aan de randjes beinkt.
Daarna willekeurig op een kaartje geplakt. Iets over de rand heen, zodat de rondjes goed uitkomen.
De stempel is een Stampin Up stempel die ik op een cirkel gestempeld heb. Daarna heb ik de auto ingekleurd met Perfect Pearls (vandaar de schittering op de foto) en Blonde Moments acrylverf. Die heeft ook een shimmer.
Omdat ik de cirkel met auto zo op de rondjes wat saai vond, heb ik nog een grotere cirkel gesneden en daar de autocirkel mee gemat.
Ook deze techniek is een blijvertje denk ik. Jammer dat ik de nieuwsbrief waar hij instaat kwijt ben, zodat ik niet de juiste naam kan noemen.
For this months Kicostampers technique - tapelifting - I had an old
book at hand. I find it difficult to destroy books. They're for reading
not to create cards from. Even if i received this one to use it I still
found it difficult but in the end I used it anyway.
In the moment between sleeping and waking up I got an idea. The circle
technique of Technique Junkies could also be done with a book. So I tore
a couple of pages from the book and punched out 1" circles. Because the
result was a bit boring I inked the edges of each circle with some old
Hero Arts inkpads.
After that I randomly glued them to a card, a bit over the edge to make
the circles stand out. The stamp is a Stampin' Up stamp I used on a circle.
Then colored the card with Perfect Pearls (that's why there is glittering
on the photograph) and Blonde Moments acrylic paint. That also contains
a shimmer.
Because I thought that the circle and the car on top of the small circles
was a bit boring I also matted the circle with a slightly larger one.
This technique is also here to stay I think . I lost the newsletter that
described the technique so I cannot call it by its proper name alas.
dinsdag 7 februari 2012
Dag 175 Layered masking
Nog een nieuwe techniek uit de nieuwste Technique Junkies nieuwsbrief.
Masking is sowieso een van mijn favoriete technieken.
In de beschrijving van de techniek wordt als achtergrond een tekststempel gebruikt. Daar heb ik niet zo een grote stempel van, en toen ik door mijn stempels bladerde, kwam ik deze tegen. Een puzzel. Dat bleek een goede zet, want ik vind het resultaat mooi.
Another new technique from the Technique Junkies Newsletter.
Masking is one of my all time favorite techniques.
In the discribtion of the technique there is a script stamp used. I do not have such a big script stamp, but I found this jigsaw puzzle. That worked out well. I like the result.
Masking is sowieso een van mijn favoriete technieken.
In de beschrijving van de techniek wordt als achtergrond een tekststempel gebruikt. Daar heb ik niet zo een grote stempel van, en toen ik door mijn stempels bladerde, kwam ik deze tegen. Een puzzel. Dat bleek een goede zet, want ik vind het resultaat mooi.
Another new technique from the Technique Junkies Newsletter.
Masking is one of my all time favorite techniques.
In the discribtion of the technique there is a script stamp used. I do not have such a big script stamp, but I found this jigsaw puzzle. That worked out well. I like the result.
maandag 6 februari 2012
Dag 174 Torn window Technique
De nieuwsbrief van Technique Junkies kwam binnen. Daar moesten natuurlijk technieken van worden uitgeprobeerd.
Deze techniek sprak me uit deze nieuwsbrief het meeste aan,
Het is een leuke techniek om te maken, heel simpel, dus ook heel geschikt voor mijn CAS stijl kaarten.
Ik heb mijn lievelings stempels weer tevoorschijn gehaald. Gestempeld op glad papier en ingekleurd met derwent Coloursoft potloden.
De bovenlaag heb ik gekleurd met verschillende kleuren Distressinkt. en daarna gescheurd, en opgerold.
Een sentiment gestempeld, uitgeknipt en vastgeplakt. Als finishing touch heb ik een metalen frame over het sentiment bevestigd met brads.
De foto is niet geweldig. Ik moet toch eens een mini studio aanschaffen om betere foto's te kunnen maken.
The Technique Junkie newletter arrived! Of course I had to try at least one of the techniques.
This one caught my eye.
This is a very easy technique, very suitable for my CAS style cards.
I got out my favorite stampset, stamped an image on a smooth background and coloured it with Derwent Coloursoft pencils.
The upper layer I coloured using Distress inks in the DTP technique. Then I torned it, and rolled the torn part.
I stamped a sentiment, cut it out, and attached it to the card. As finishing touch I put a metal frame over the sentiment.
The picture is not real good. I need to get a small studio, to make better pictures of my artwork.
Deze techniek sprak me uit deze nieuwsbrief het meeste aan,
Het is een leuke techniek om te maken, heel simpel, dus ook heel geschikt voor mijn CAS stijl kaarten.
Ik heb mijn lievelings stempels weer tevoorschijn gehaald. Gestempeld op glad papier en ingekleurd met derwent Coloursoft potloden.
De bovenlaag heb ik gekleurd met verschillende kleuren Distressinkt. en daarna gescheurd, en opgerold.
Een sentiment gestempeld, uitgeknipt en vastgeplakt. Als finishing touch heb ik een metalen frame over het sentiment bevestigd met brads.
De foto is niet geweldig. Ik moet toch eens een mini studio aanschaffen om betere foto's te kunnen maken.
The Technique Junkie newletter arrived! Of course I had to try at least one of the techniques.
This one caught my eye.
This is a very easy technique, very suitable for my CAS style cards.
I got out my favorite stampset, stamped an image on a smooth background and coloured it with Derwent Coloursoft pencils.
The upper layer I coloured using Distress inks in the DTP technique. Then I torned it, and rolled the torn part.
I stamped a sentiment, cut it out, and attached it to the card. As finishing touch I put a metal frame over the sentiment.
The picture is not real good. I need to get a small studio, to make better pictures of my artwork.
maandag 23 januari 2012
Dag 161 Burnished Embossing
Op de CD die ik heb gekocht, staat een tutorial voor Burnished Embossing, en die wilde ik uitproberen vanavond.
Het 'Hello' en 'My Friend' was snel gestempeld, en met wit geembossed. Daarna met Bravo Burundy inkt over de teksten gesponst.
Ik heb even zitten puzzelen over hoe ik de kaart wilde afmaken. De bloemen links zijn half op de kaart gestempeld.
Het ornament rechts bestaat uit 2x dezelfde stempel, op verschillende hoogte gestempeld.
Daarmee was de kaart af.
One of the tutorials on the new CD, is the one about Burnished Embossing. I wanted to try that tonight.
The Hello and the My friend was quick stamped and embossed. I sponged Bravo Burundy over the sentiments.
I had to think over how I wanted to finish the card. I stamped the flowers left on the card. And the ornament, which is 2 times the same stamp, but stamped on different hights.
Het 'Hello' en 'My Friend' was snel gestempeld, en met wit geembossed. Daarna met Bravo Burundy inkt over de teksten gesponst.
Ik heb even zitten puzzelen over hoe ik de kaart wilde afmaken. De bloemen links zijn half op de kaart gestempeld.
Het ornament rechts bestaat uit 2x dezelfde stempel, op verschillende hoogte gestempeld.
Daarmee was de kaart af.
One of the tutorials on the new CD, is the one about Burnished Embossing. I wanted to try that tonight.
The Hello and the My friend was quick stamped and embossed. I sponged Bravo Burundy over the sentiments.
I had to think over how I wanted to finish the card. I stamped the flowers left on the card. And the ornament, which is 2 times the same stamp, but stamped on different hights.
Abonneren op:
Posts (Atom)